Manual
How to install and setup Um-Switcher

Download Um Switcher
To get started, download the plugin zip file from Codecanyon. You can find your zip on your download page. Scroll to Um Switcher and click the download button. Select All files & documentation, and you now have your copy of Um Switcher.

STEP 1
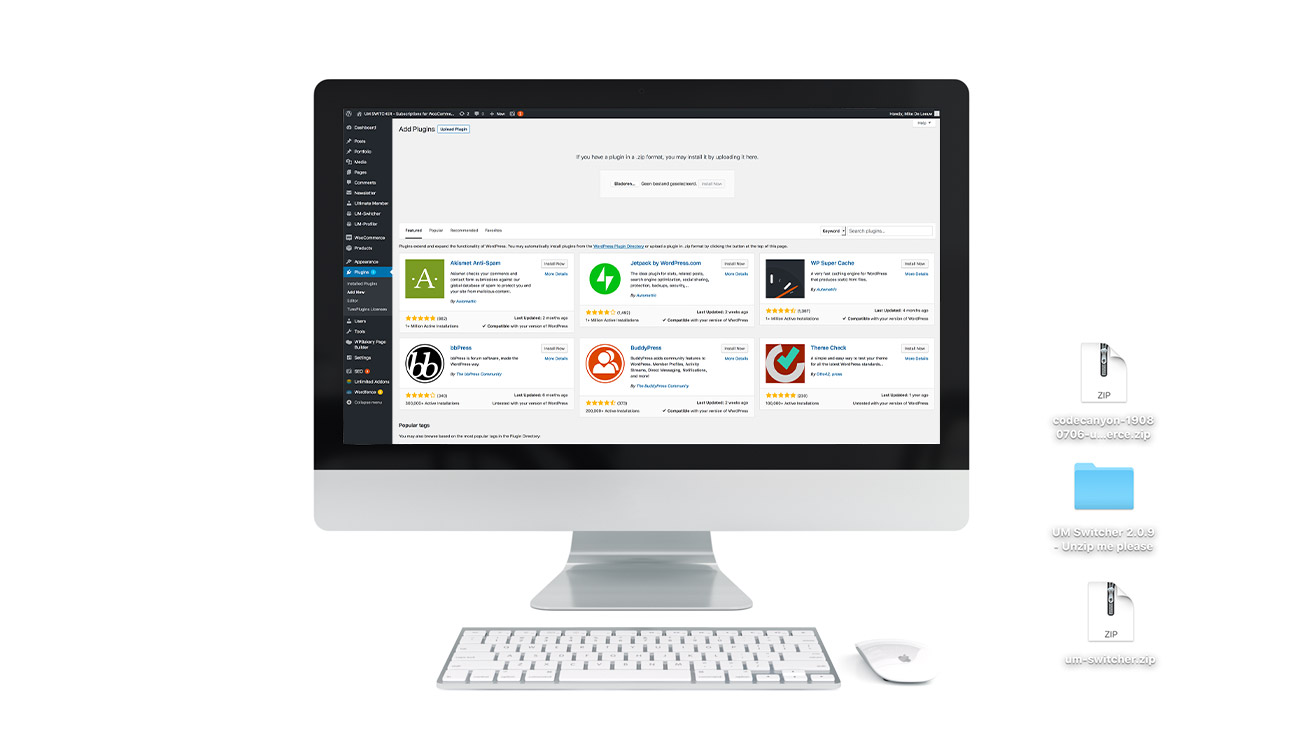
2- Upload via FTP
Use your ftp software like Filezilla and upload the unzipped file: umswitcher to wp-content/plugins.
Upload via Plugin Uploader
Upload the umswitcher.zip file via the plugin uploader. Go to plugins/Add new.
Activate WooCommerce and Ultimate member
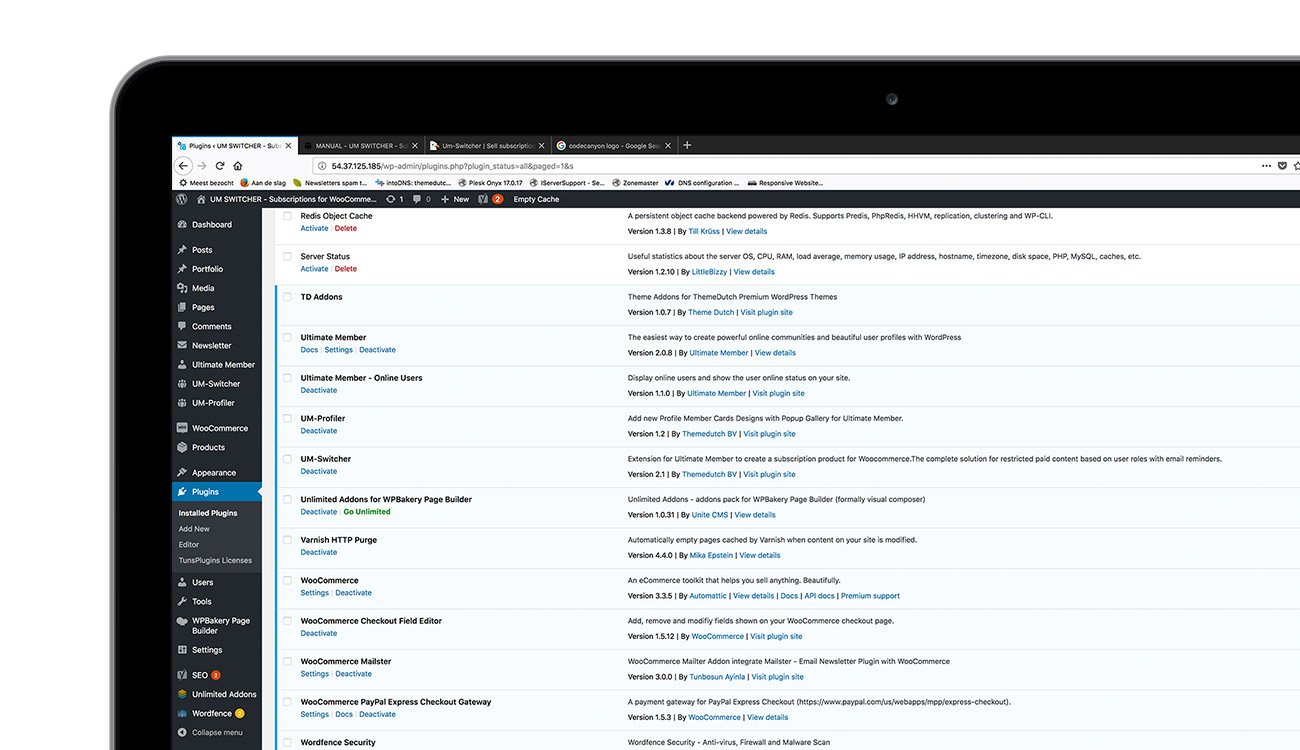
Visit your plugins and activate WooCommerce, Ultimate member and UM-switcher.
STEP 2
STEP 3
Create user roles
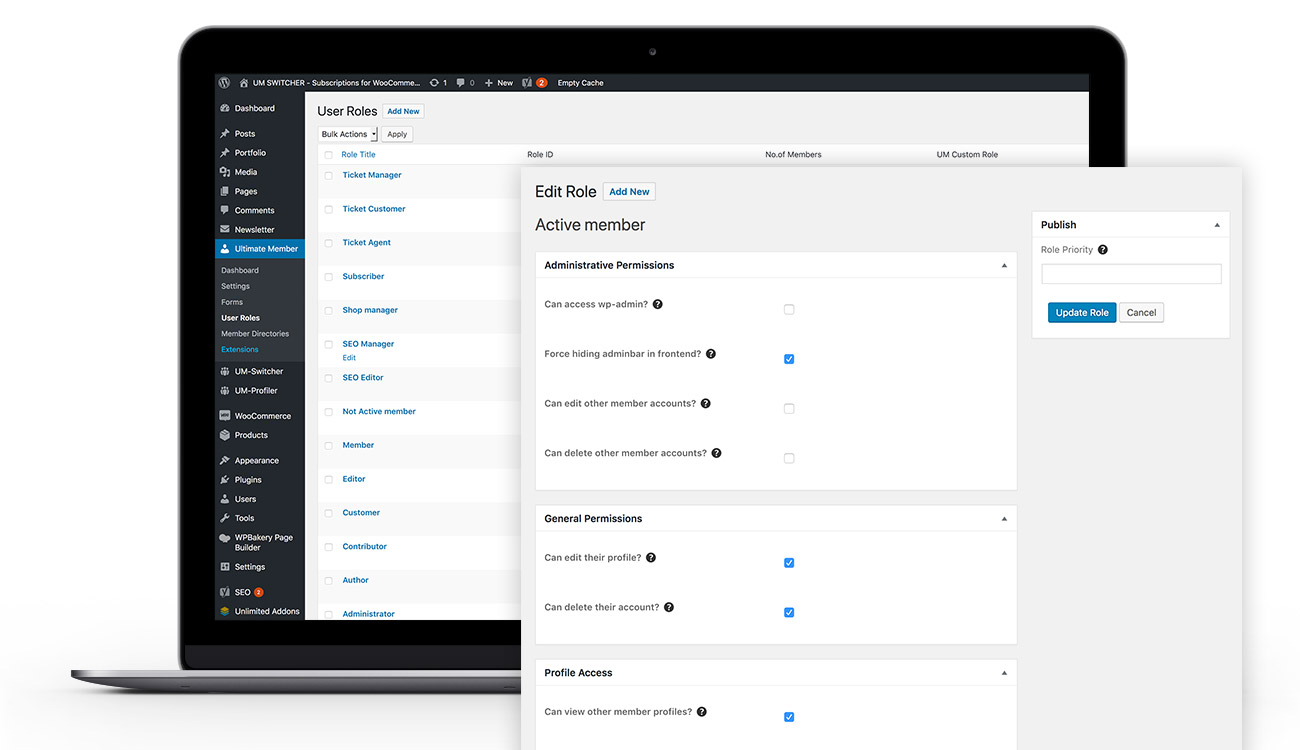
First create WP roles for your subscription plans. Per example roles for ‘active member’ and ‘not active member’. You’re free to use names for roles that fits you best. For more details how to setup user roles read the docs provided by Ultimate member as this is a feature of UM and not from um-switcher.
STEP 4
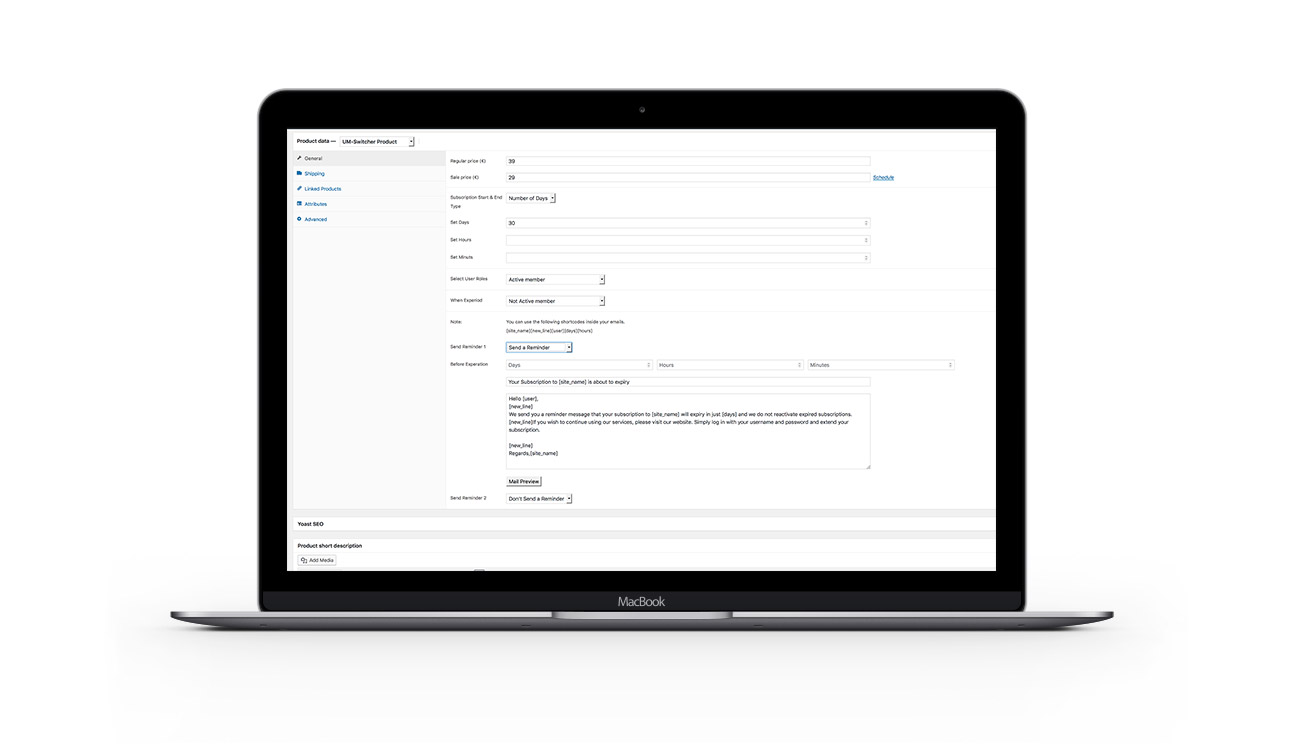
Create Um-Switcher products
WoocCommerce
Go to Woocommerce/products/add new product, and select ‘UM-Switcher Product’ via the Product Data drop down. Select ‘Number of days’, and set days, hours or minutes for this subscription. Or, select ‘End Date’ and set start and end date. Select the User role that gets access with this subscription. Set up the User role for expiration (end subscription). Select ‘Send a Reminder’ if you want to send e-mail reminders. These input fields are self-explanatory. Then hit ‘save’.
Registration through WoocCommerce
Add created (UM-Switcher) products to your shop page so your users can buy them. When users order en pay the product, they get the User Role you have set before. As soon as their subscriptions expire, their User Role will change back again and ‘restricted fields’ not show any longer.
Registration through Ulitmate Member
You can opt for user registration through Ultimate member. You may give your members the possibility to look around first before offering your membership plans. Members/users then have access to pages, fields and menu items based on their user role you have set up. Your members first need to make a purchase to have access to all your goodies.
STEP 5
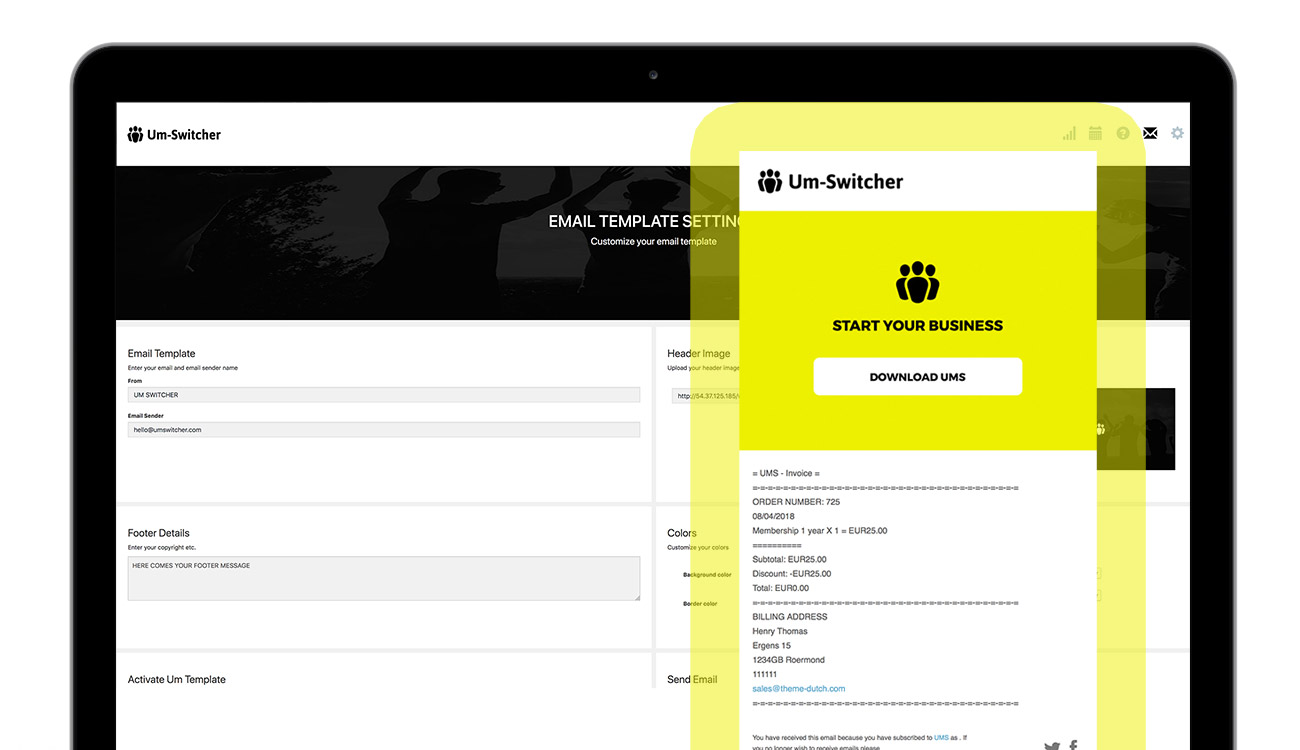
E-mail template
Setup your e-mail template or use your favorite email template plugin such as Mailster Newsletter plugin. You can also use one of the free email template plugins out there. It’s your choice. Don’t forget to select and Activate UM template.
Restrict pages, menu’s and profile fields
Ultimate member offers a wide range of options to restrict content based on user roles.
Profile fields
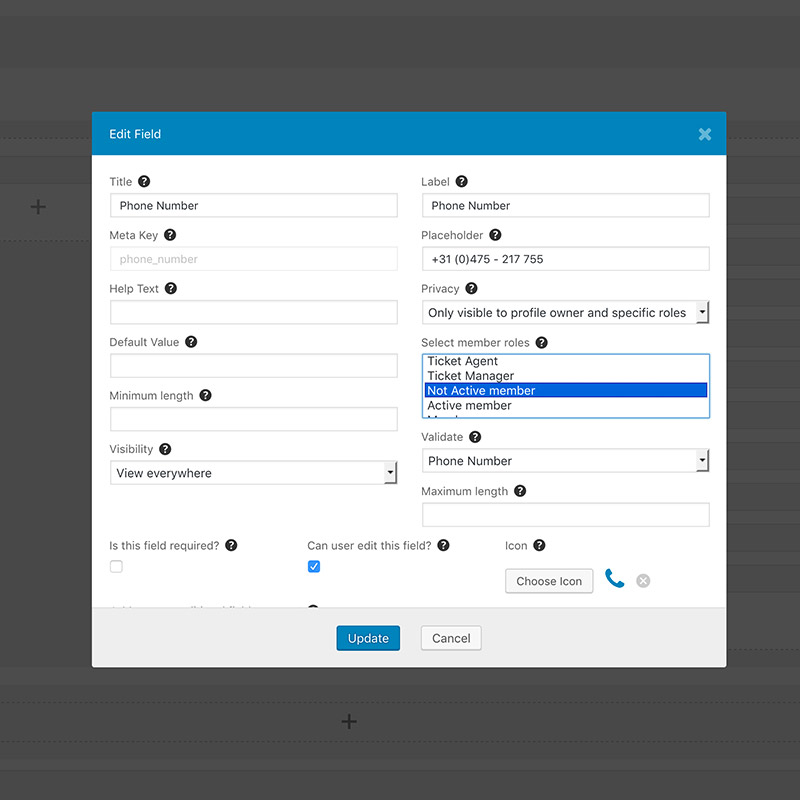
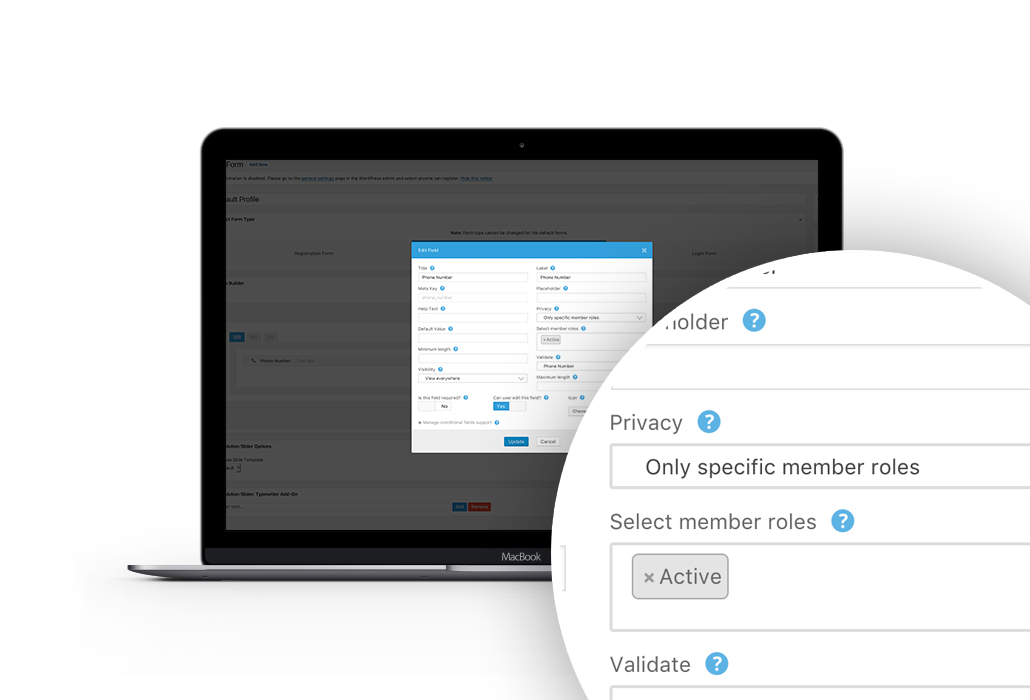
Create a UM profile form and insert form fields where you set up access-based WP roles. Set restricted profile fields like ‘contact details’ via Privacy selection. Hit: only specific WP roles, and enter the required role(s) that will have access (via the drop down menu). Once you select ‘only visible to profile owner and specific roles’, only the profile owner and selected WP roles are able to see these form fields’ content.
UM Expiration date
You will also find a field ‘UM Expiration date’. This field displays the expiration date of this user’s profile. Again, you can set up WP role(s) that can see this field.
Restrict Menus
Go to your menu section on the back end and you will see now a few options for displaying menu items (Ultimate Member menu settings) and restrictions to specific user roles, how cool is that. In our preview, you will only see Members through the main menu, when you’re logged in.
Restrict Pages
On a page, at UM Content Restrictions, you will see a menu for selecting user roles with access to the page.
STEP 6
Community roles is now Default WP user roles
Since version 2.0 Ultimate Member Community roles changed in to standard WordPress roles, which are also used by UM-Switcher.
Set up cron jobs for e-mail reminders
Create a cron job
for renew notifications
Sending accurate e-mail renew reminders need setting up a cron job. In cases such as subscription plans sold for only limited time e.g. 15 minutes, you can set your cron job to run every 10 minutes. If you send email reminders, don’t forget to adjust the time via um-switcher product settings.
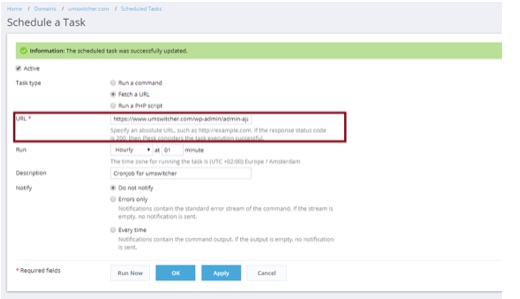
Visit your Hosting dashboard, like cPanel or Plesk, and create a cron job that is suitable for your website. You’re able to set an interval as low as one minute. You should consider a reasonable value of 5-15 minutes though. If you need help setting up a cron job, please check your hosting provider’s documentation carefully.
Cronjob settings
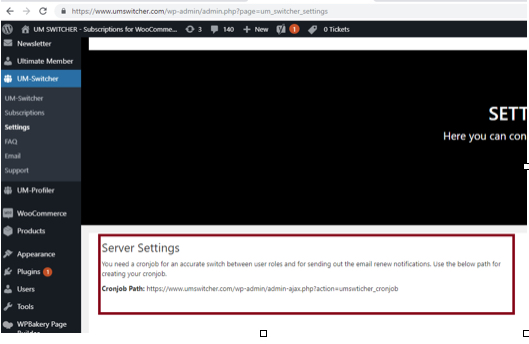
Since UMS version 2.10 there is no need in filling your server settings anymore. When you visit the Cron job section, you will see a cron job Path. Use this path to create your cron job at your hosting control panel.
Timezone settings
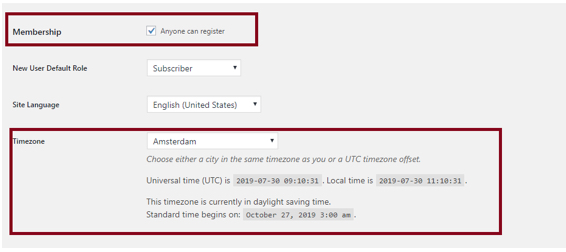
From your WP dashboard/settings/general select your city as Timezone.
STEP 7
Cronjob – setup:
This link is needed for your Cronjob, (Cronjob Path).
STEP 8
Adding Cronjob:
This is just one hosting example, and where you add the link from UMS.
Membership settings
Check your membership and set up your time zone.
WooCommerce settings
Set up your WooCommerce settings like this:

NEW FEATURE 2.1
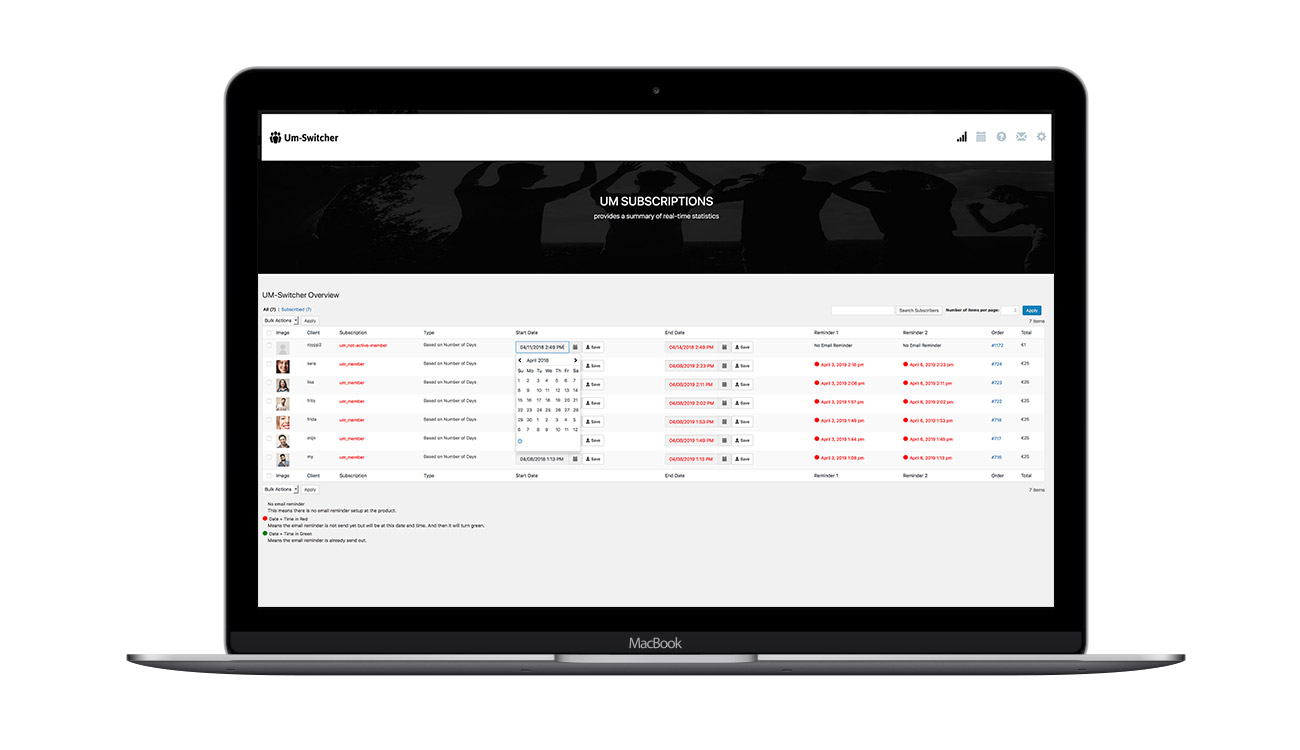
Change dates of a subscription (beta)
Since UM-Switcher 2.1 we have added a new feature. Now you can also adjust the start- and end date of a subscription. This is a handy feature when you move from your old system. You can find this via your Um Subscriptions overview page.


